02 / 19 · Ready before the session begins

Immersive stage configurator

One guided screen plans, places and rehearses a multi-device prototype test in a 3D model of the room. An enabler for my chapter at Roche: it saves time, supports our agentic prototyping workflow and brings prototypes onto the immersive stage.

Client
Roche Diagnostics
Industry
Healthcare & life sciences
Work
Service design, Product design, Interaction design

On the immersive stage in Roche's customer experience lab, a participant holds a tablet in front of projected instruments. A moderator drives the scenario from another tablet, and every screen in the room has to follow, with the right persona at the right step.

Teams set this up by hand. They placed six to eight devices, typed a link into each, walked between screens to check the flow and kept scenarios in step with the interview guide. Mistakes surfaced in front of participants, and the next project started from scratch.

Could a team set up, rehearse and share a whole session before anyone walks into the room?

The configurator turns a session's set-up into one visual, testable, shareable configuration. Touch points sit in a 3D model of the real room, each device gets a QR code, and a scenario plays through on screen first. For my chapter at Roche it is an enabler. It saves time, fits our agentic prototyping workflow and brings every prototype onto the immersive stage, where people get a feel for what the lab could be like.
What made it hard

  • One room, no shared picture

    Teams talked about "the tablet by the window" with no common view, so placement mistakes surfaced on test day.

  • Links typed by hand

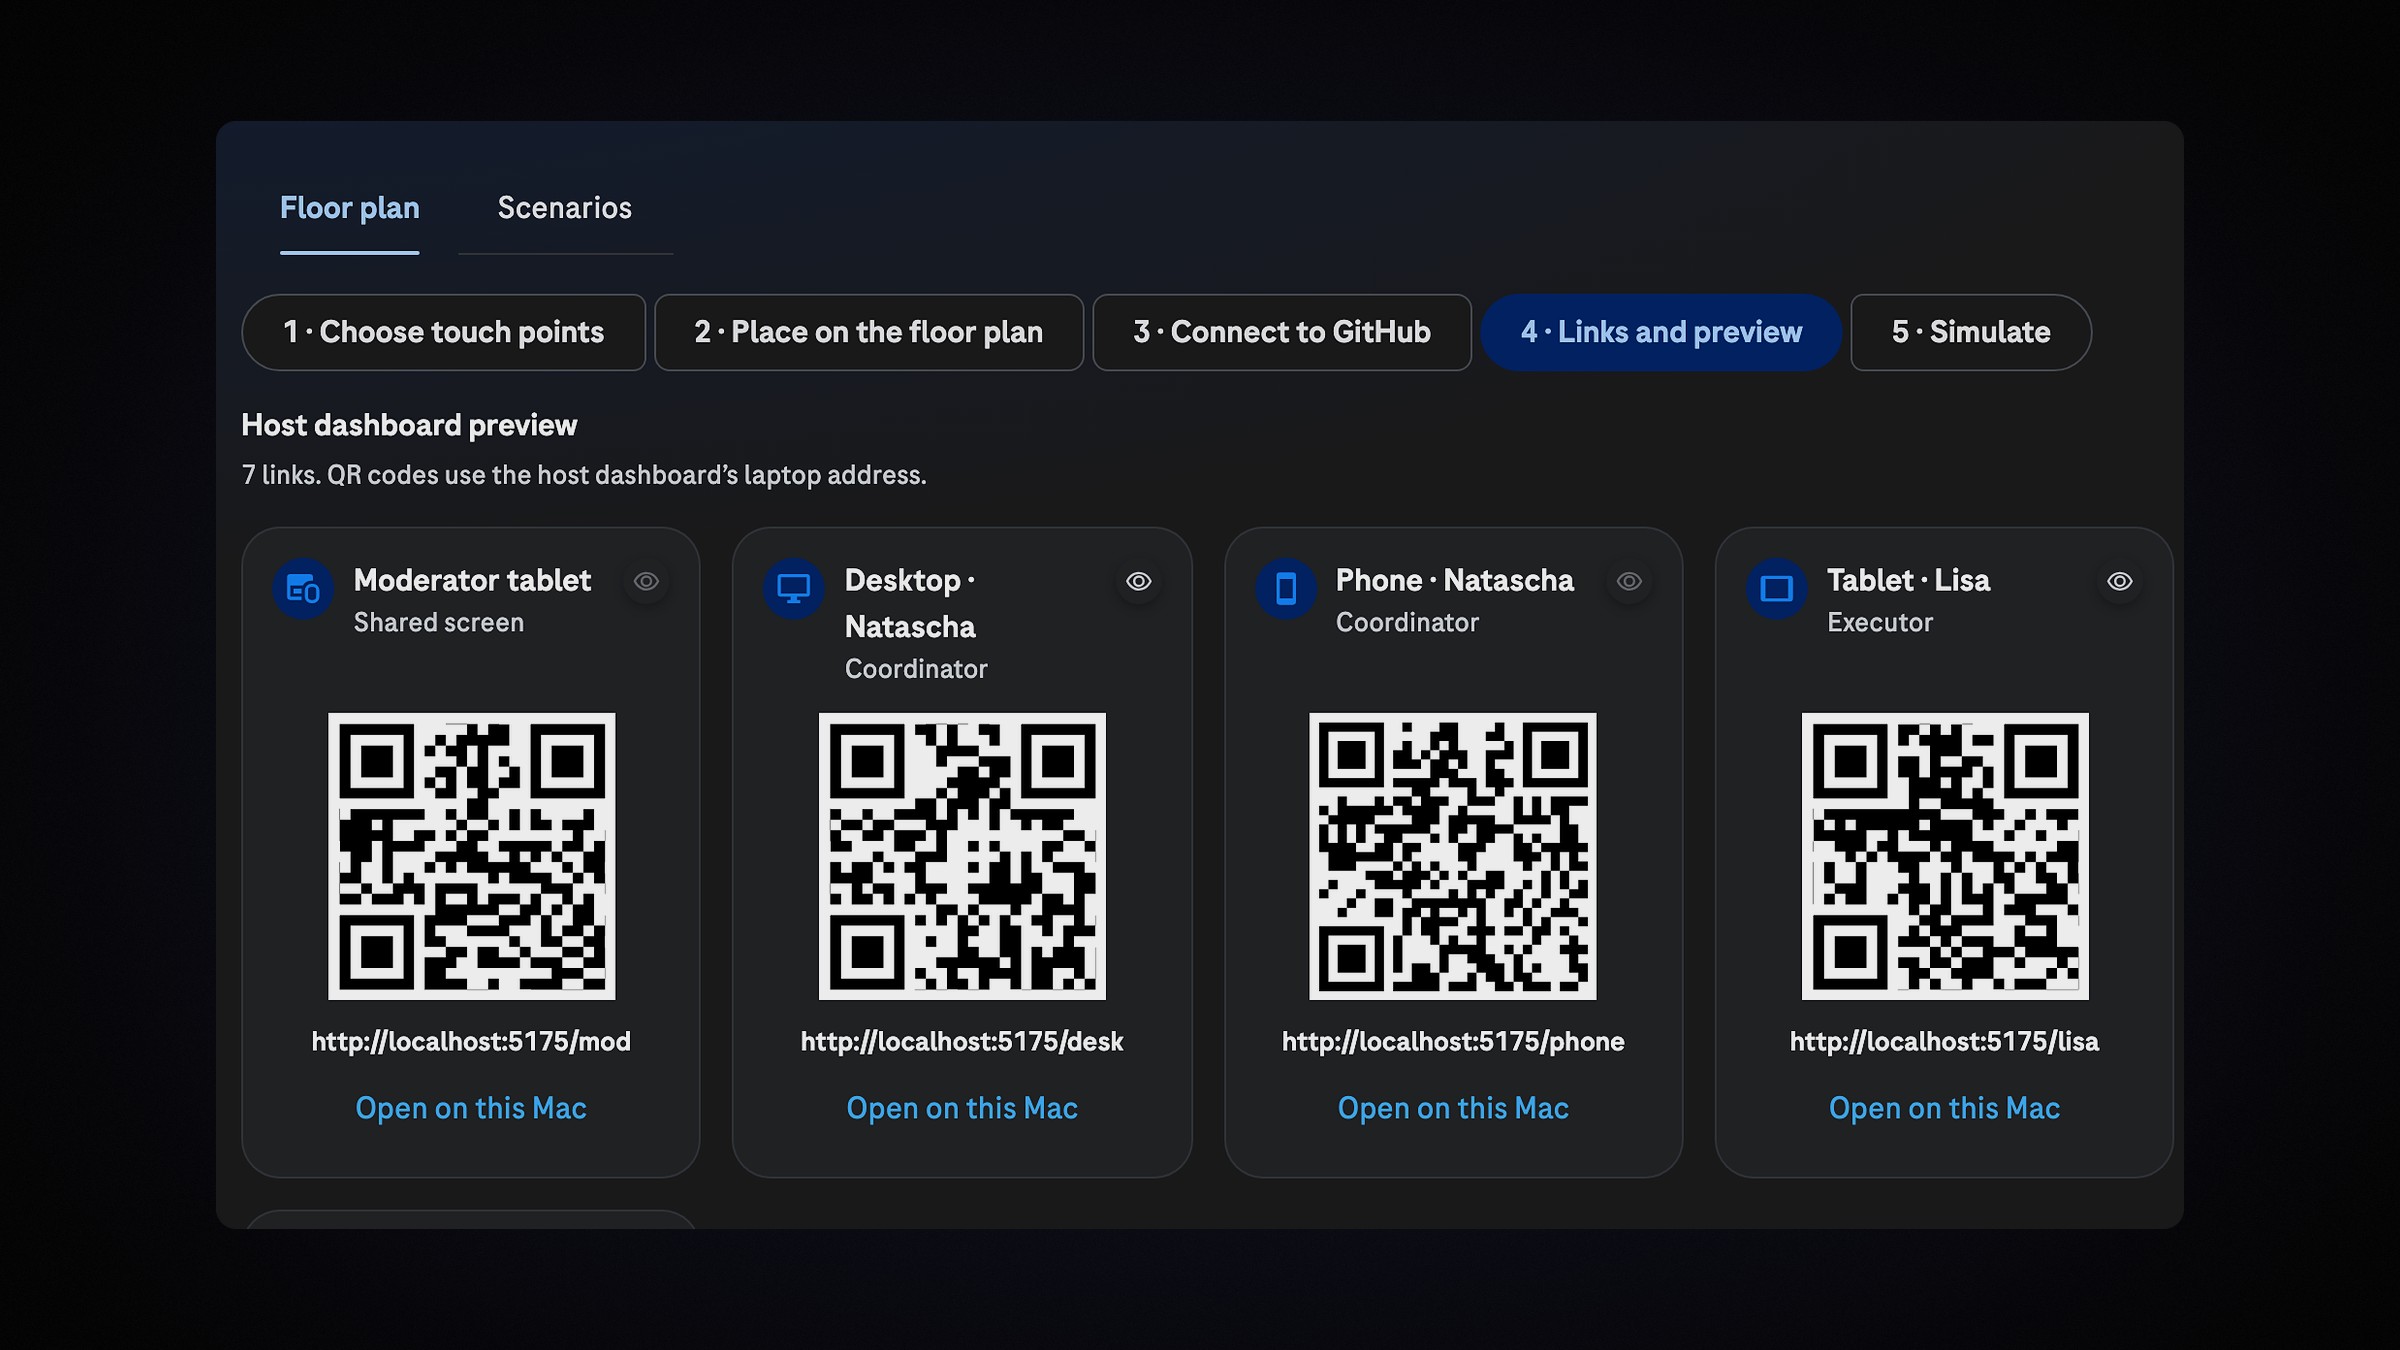
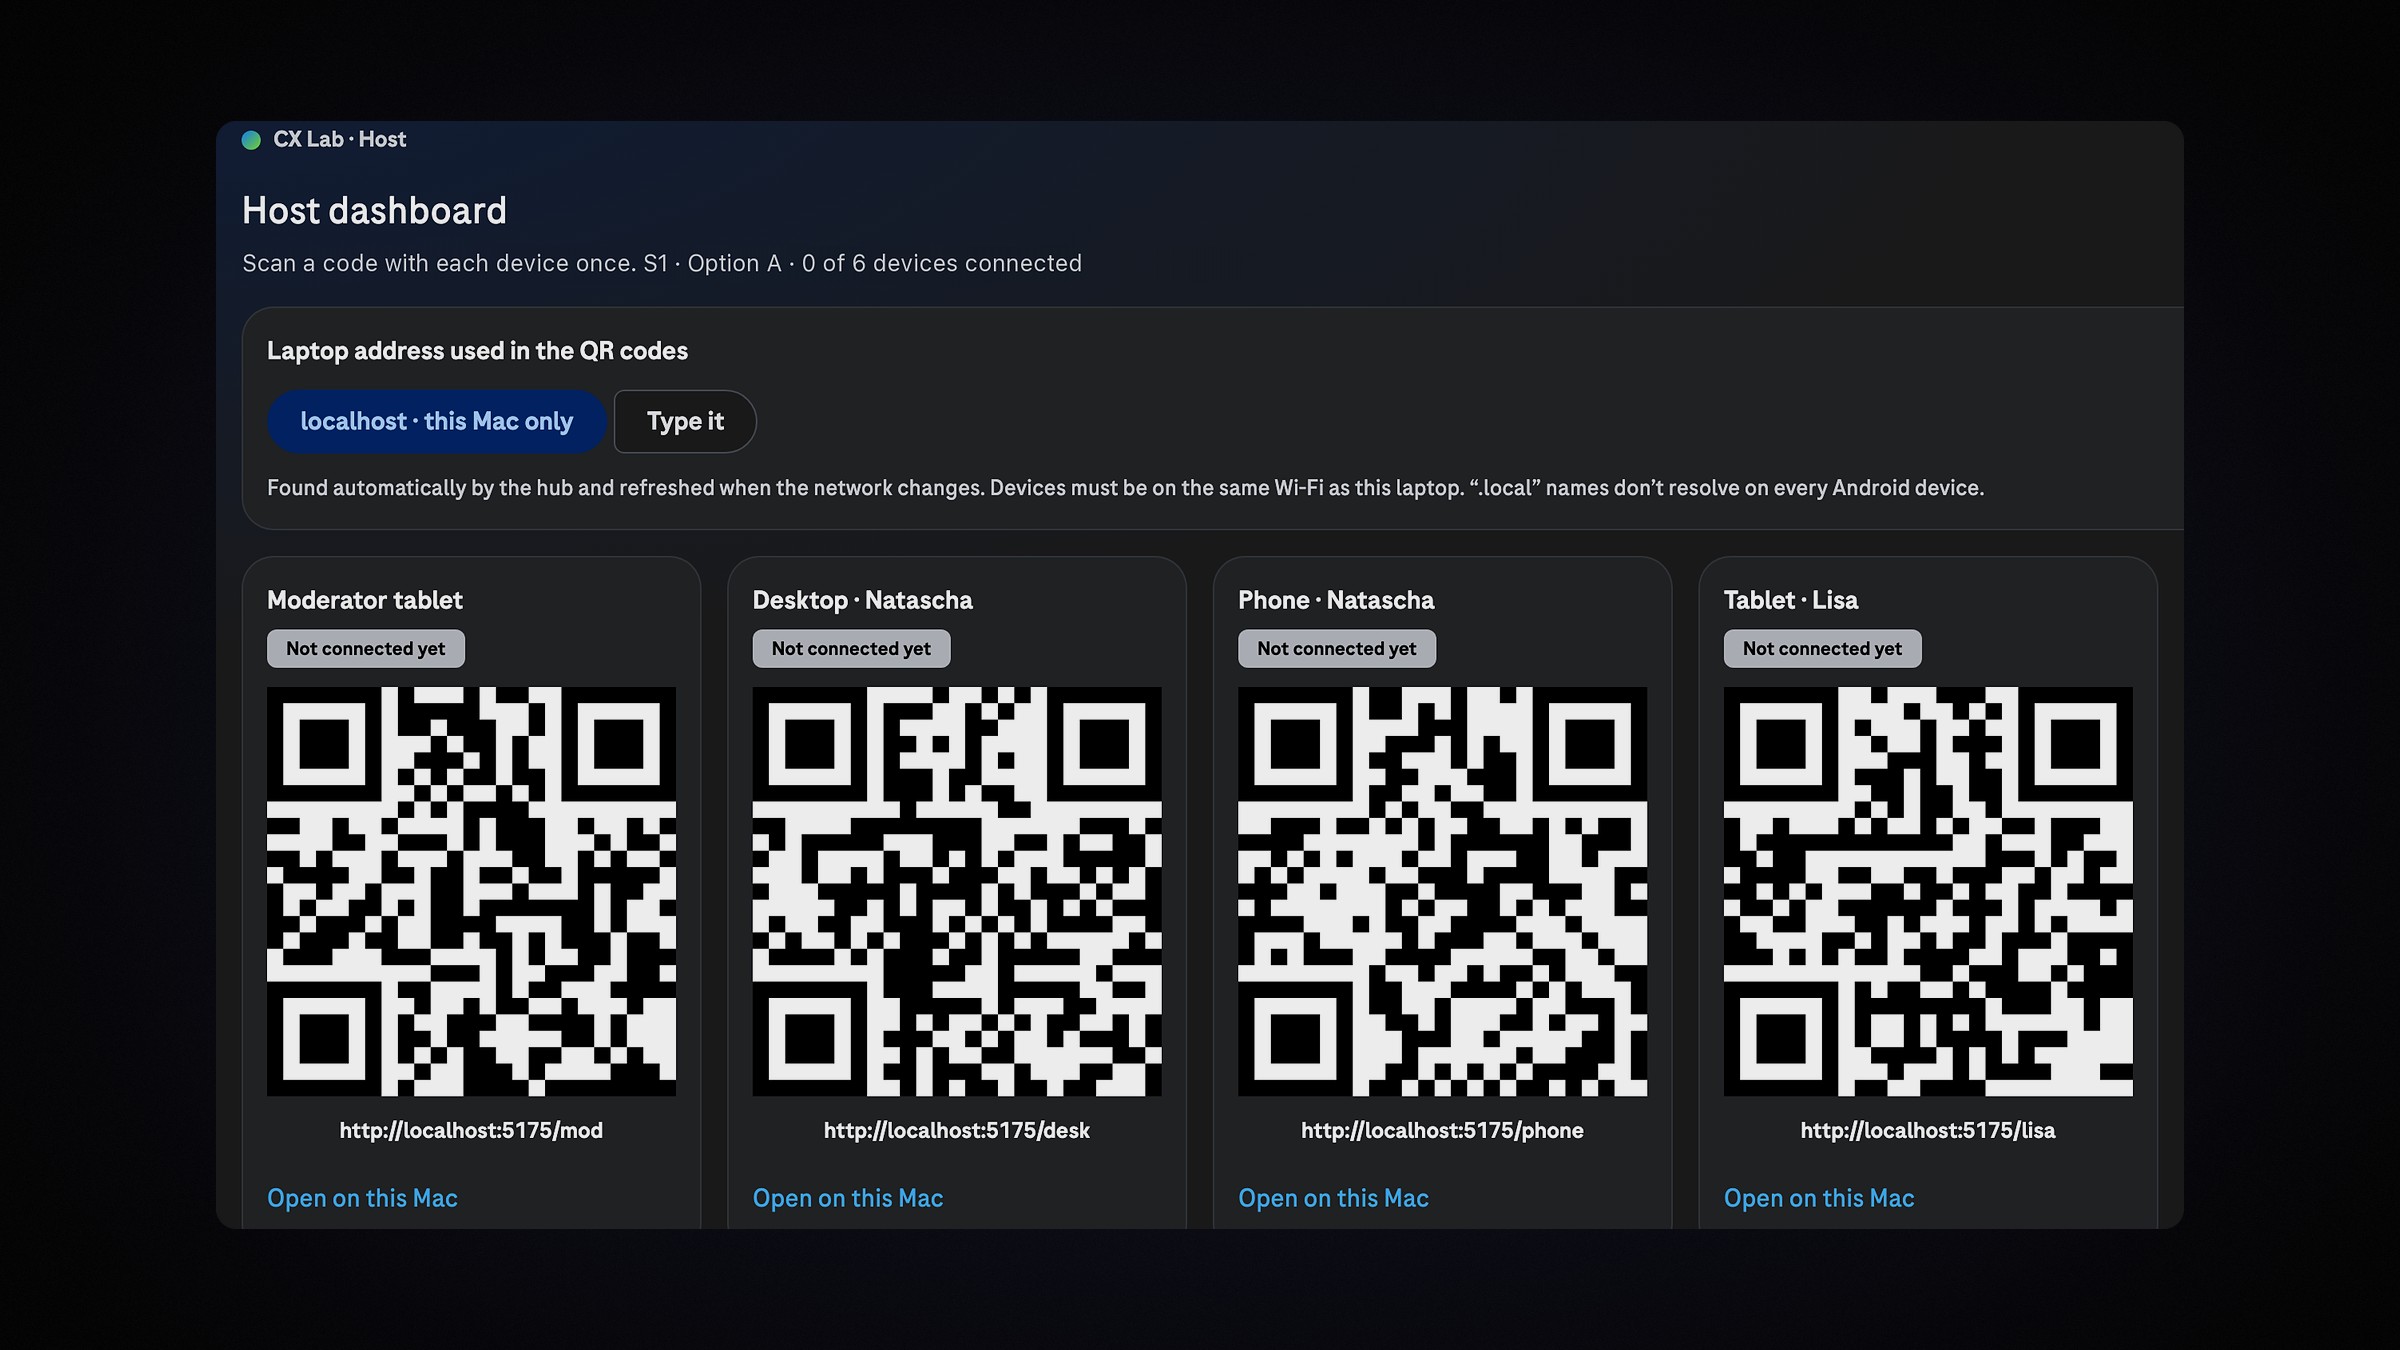
    Every device needed a link typed against the laptop's address, and one typo or address change broke the session.

  • No rehearsal without the room

    Seeing the flow across every screen took a full dry run in the room, so problems surfaced late.

  • Sensitive guides, no uploads

    Interview guides and lab details can be sensitive, so nothing could leave the browser unless someone downloaded it.

Questions we asked

  1. Where does each device stand, and what will a participant see from there?
  2. How does every device open the right screen without anyone typing a link?
  3. Can a team check the whole flow, across every screen, before test day?
  4. How do the scenarios in an interview guide reach the prototype without retyping?
01

A real lab, recreated

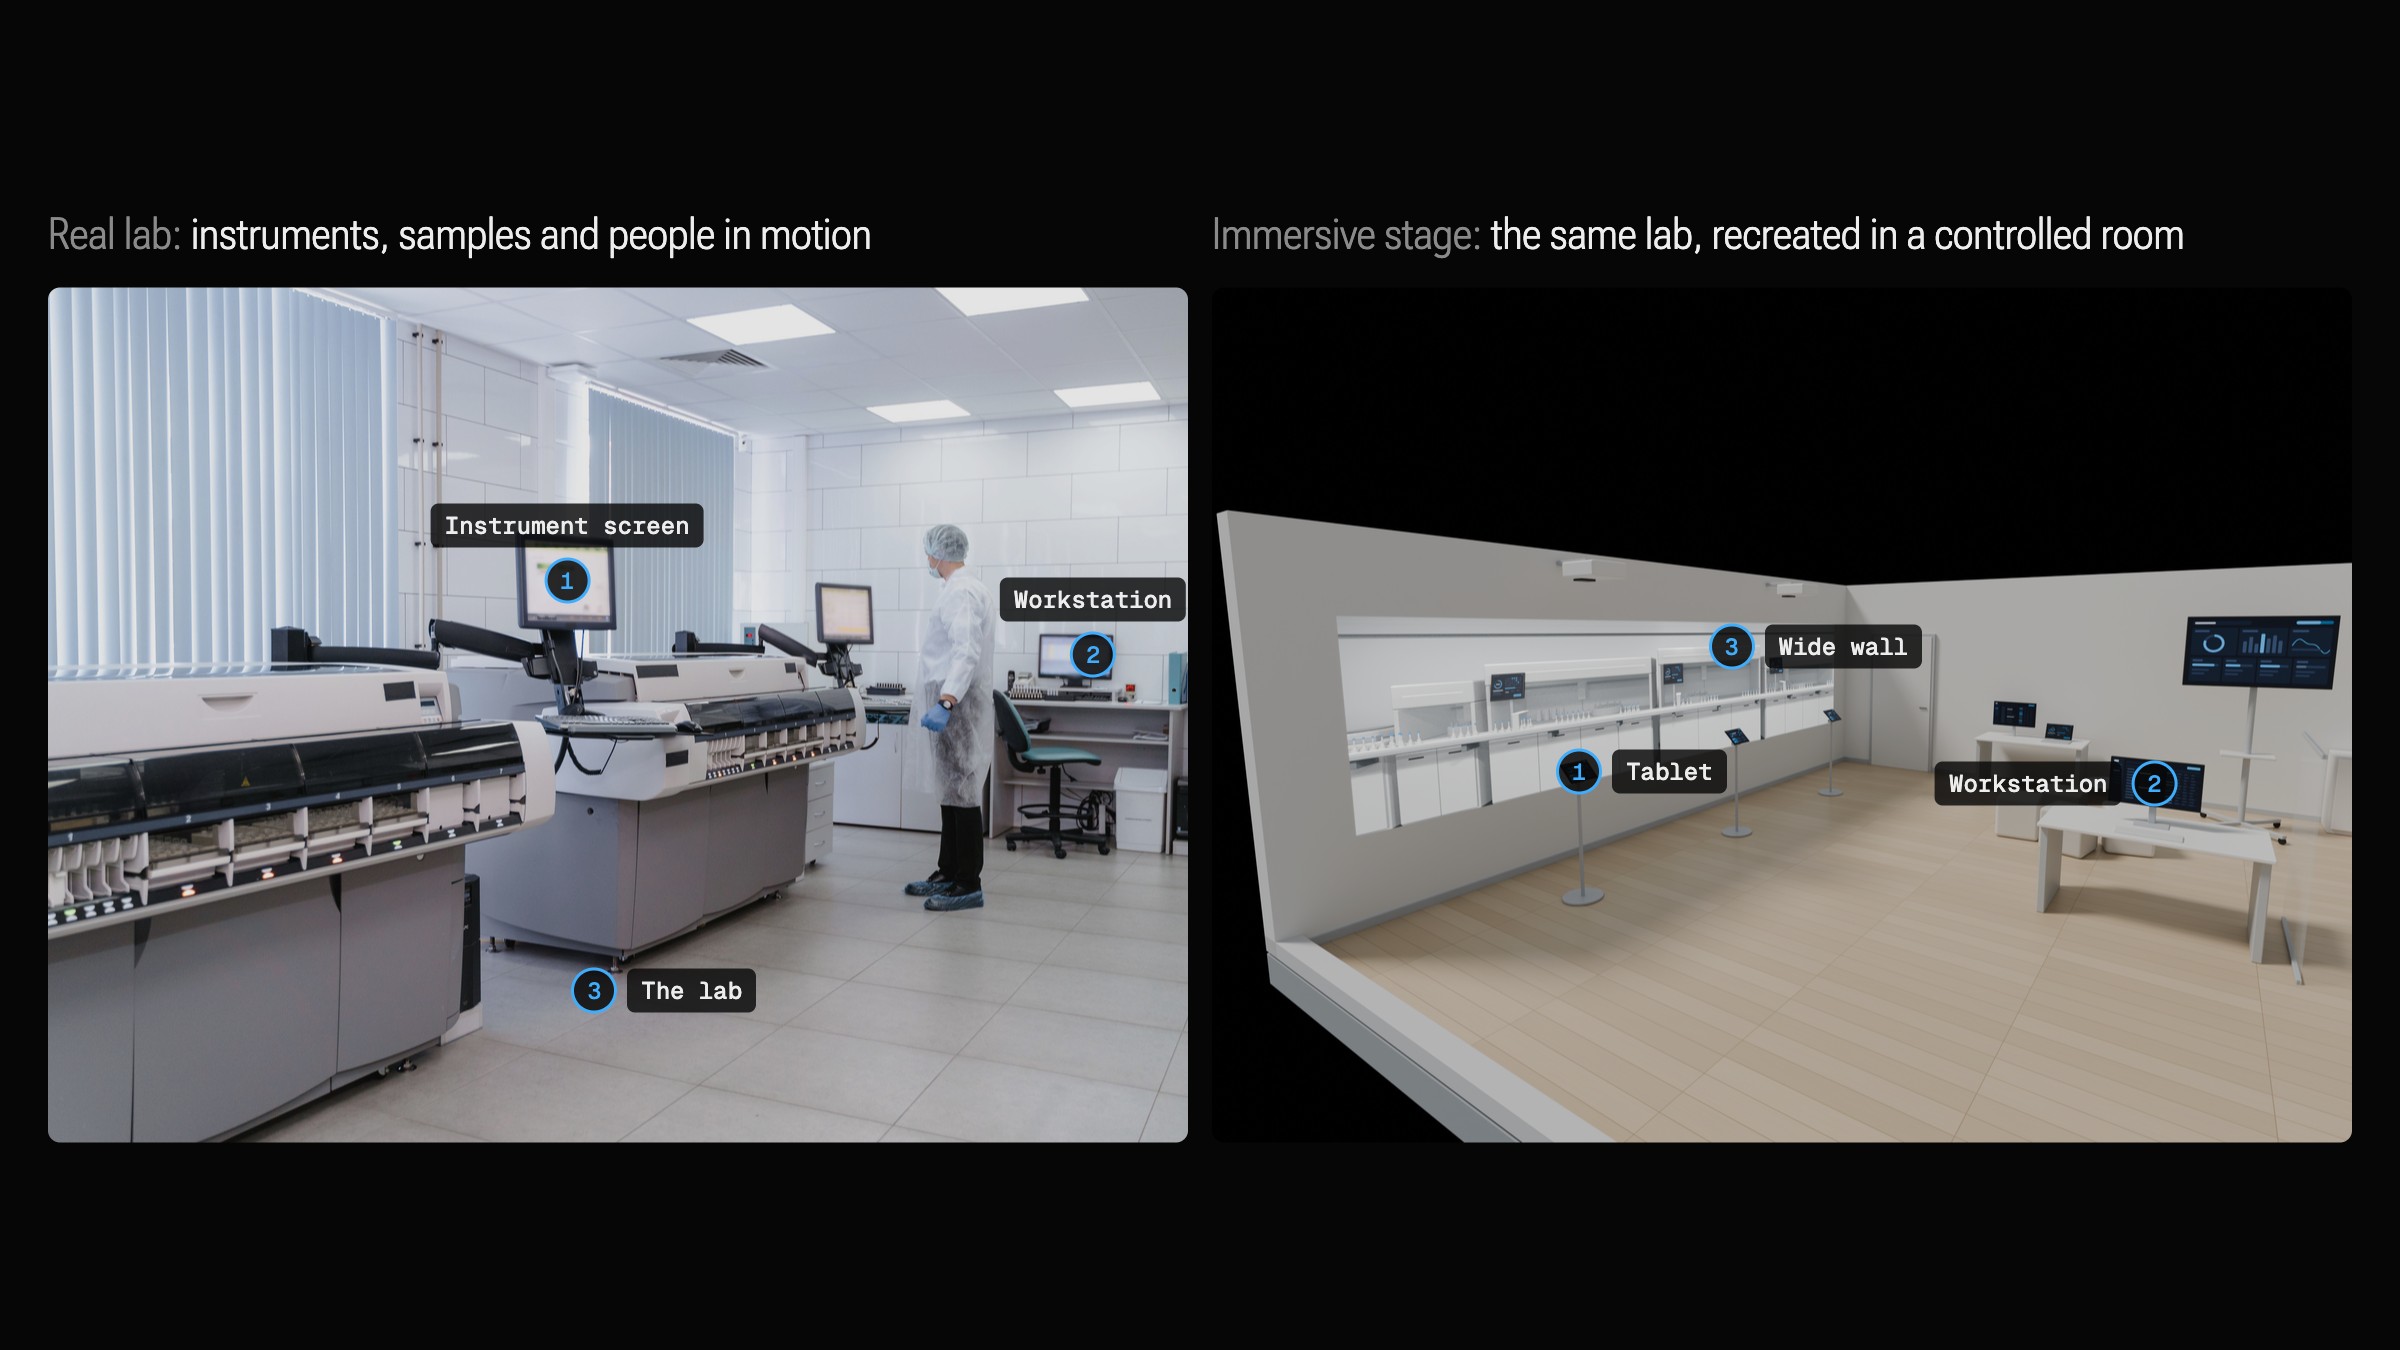
A real lab has instruments, sample flow and people moving between screens. The immersive stage recreates it digitally in a controlled room: instruments projected on the wide wall, tablets held up as their screens, an overhead screen for status. That lets a team test a prototype in context.

A real lab, recreated

Real lab. Photo: Tima Miroshnichenko, Pexels. The stage recreating it is rendered.

02

Every device, placed in 3D

The floor plan runs in five steps. First, pick the touch points: moderator tablet, tablets, phone, desktop, wide wall and overhead screen. Then click a spot in a 3D model of the real room, and the device lands there. An eye icon shows the view from each kind of spot.

The plan tilts into 3D; a click places a device and a drag moves it.

03

Plug in the prototype

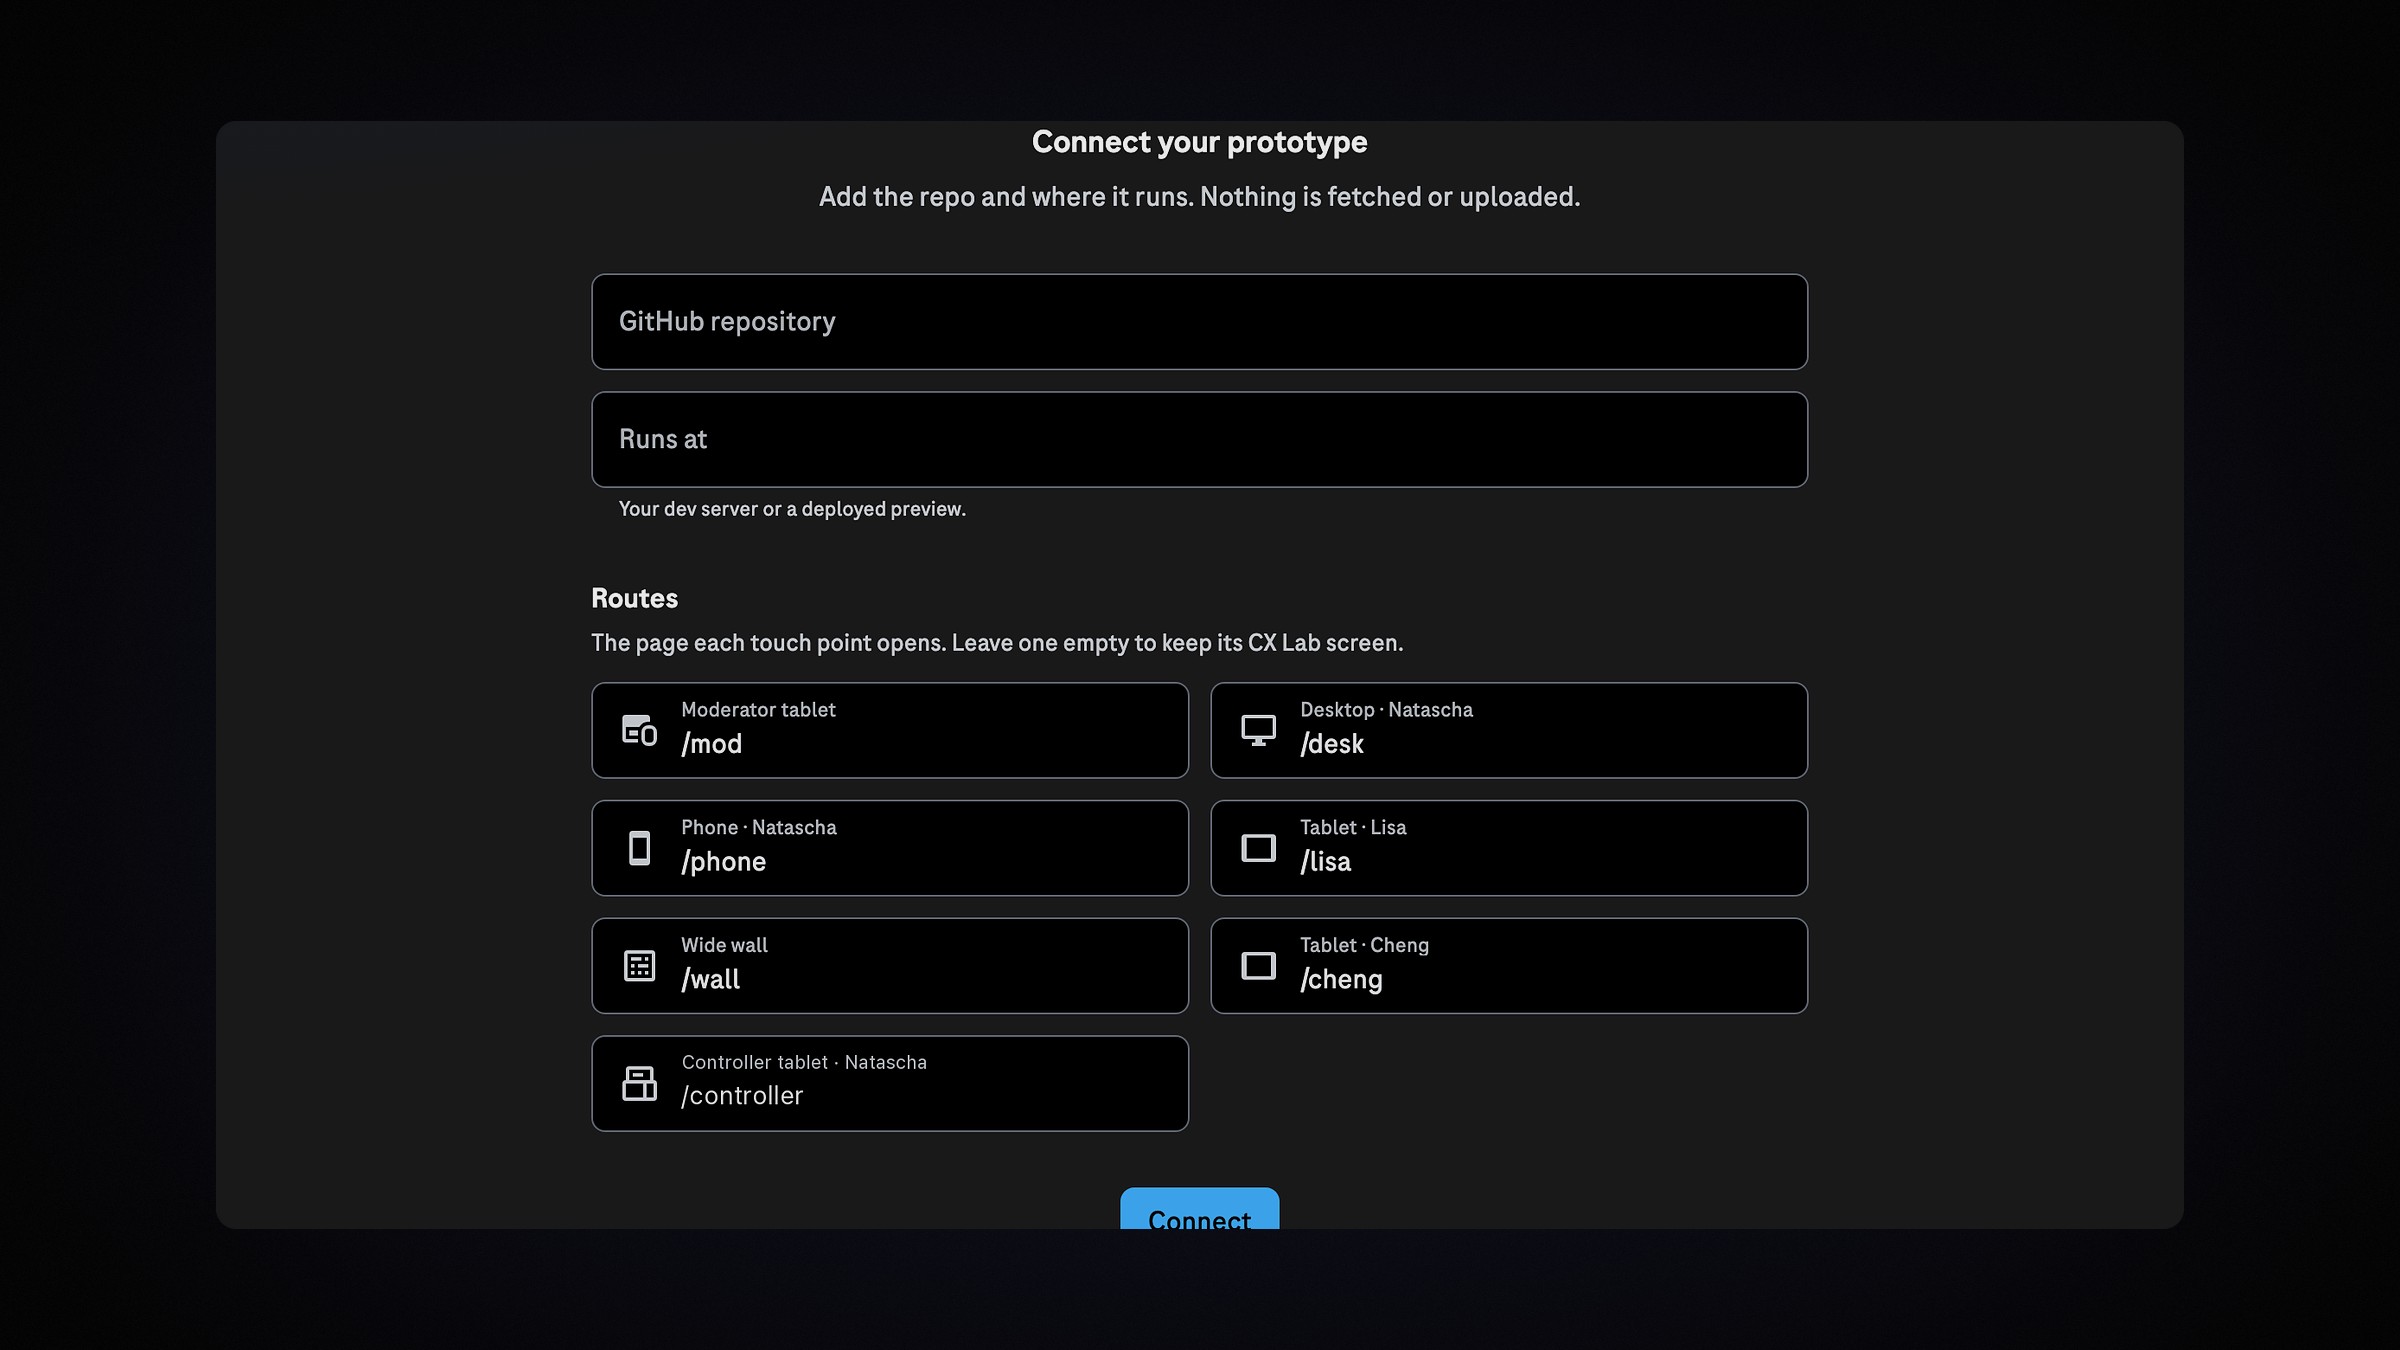
Step three connects the prototype: its repository, where it runs and the route each touch point opens. This is where our agentic prototyping workflow plugs in: a prototype in a repository reaches every screen on the stage. For now it is a concept step, with no sign-in and no uploads.

Plug in the prototype

Each touch point opens its own route; an empty route keeps the device's lab screen.

05

Rehearse on screen

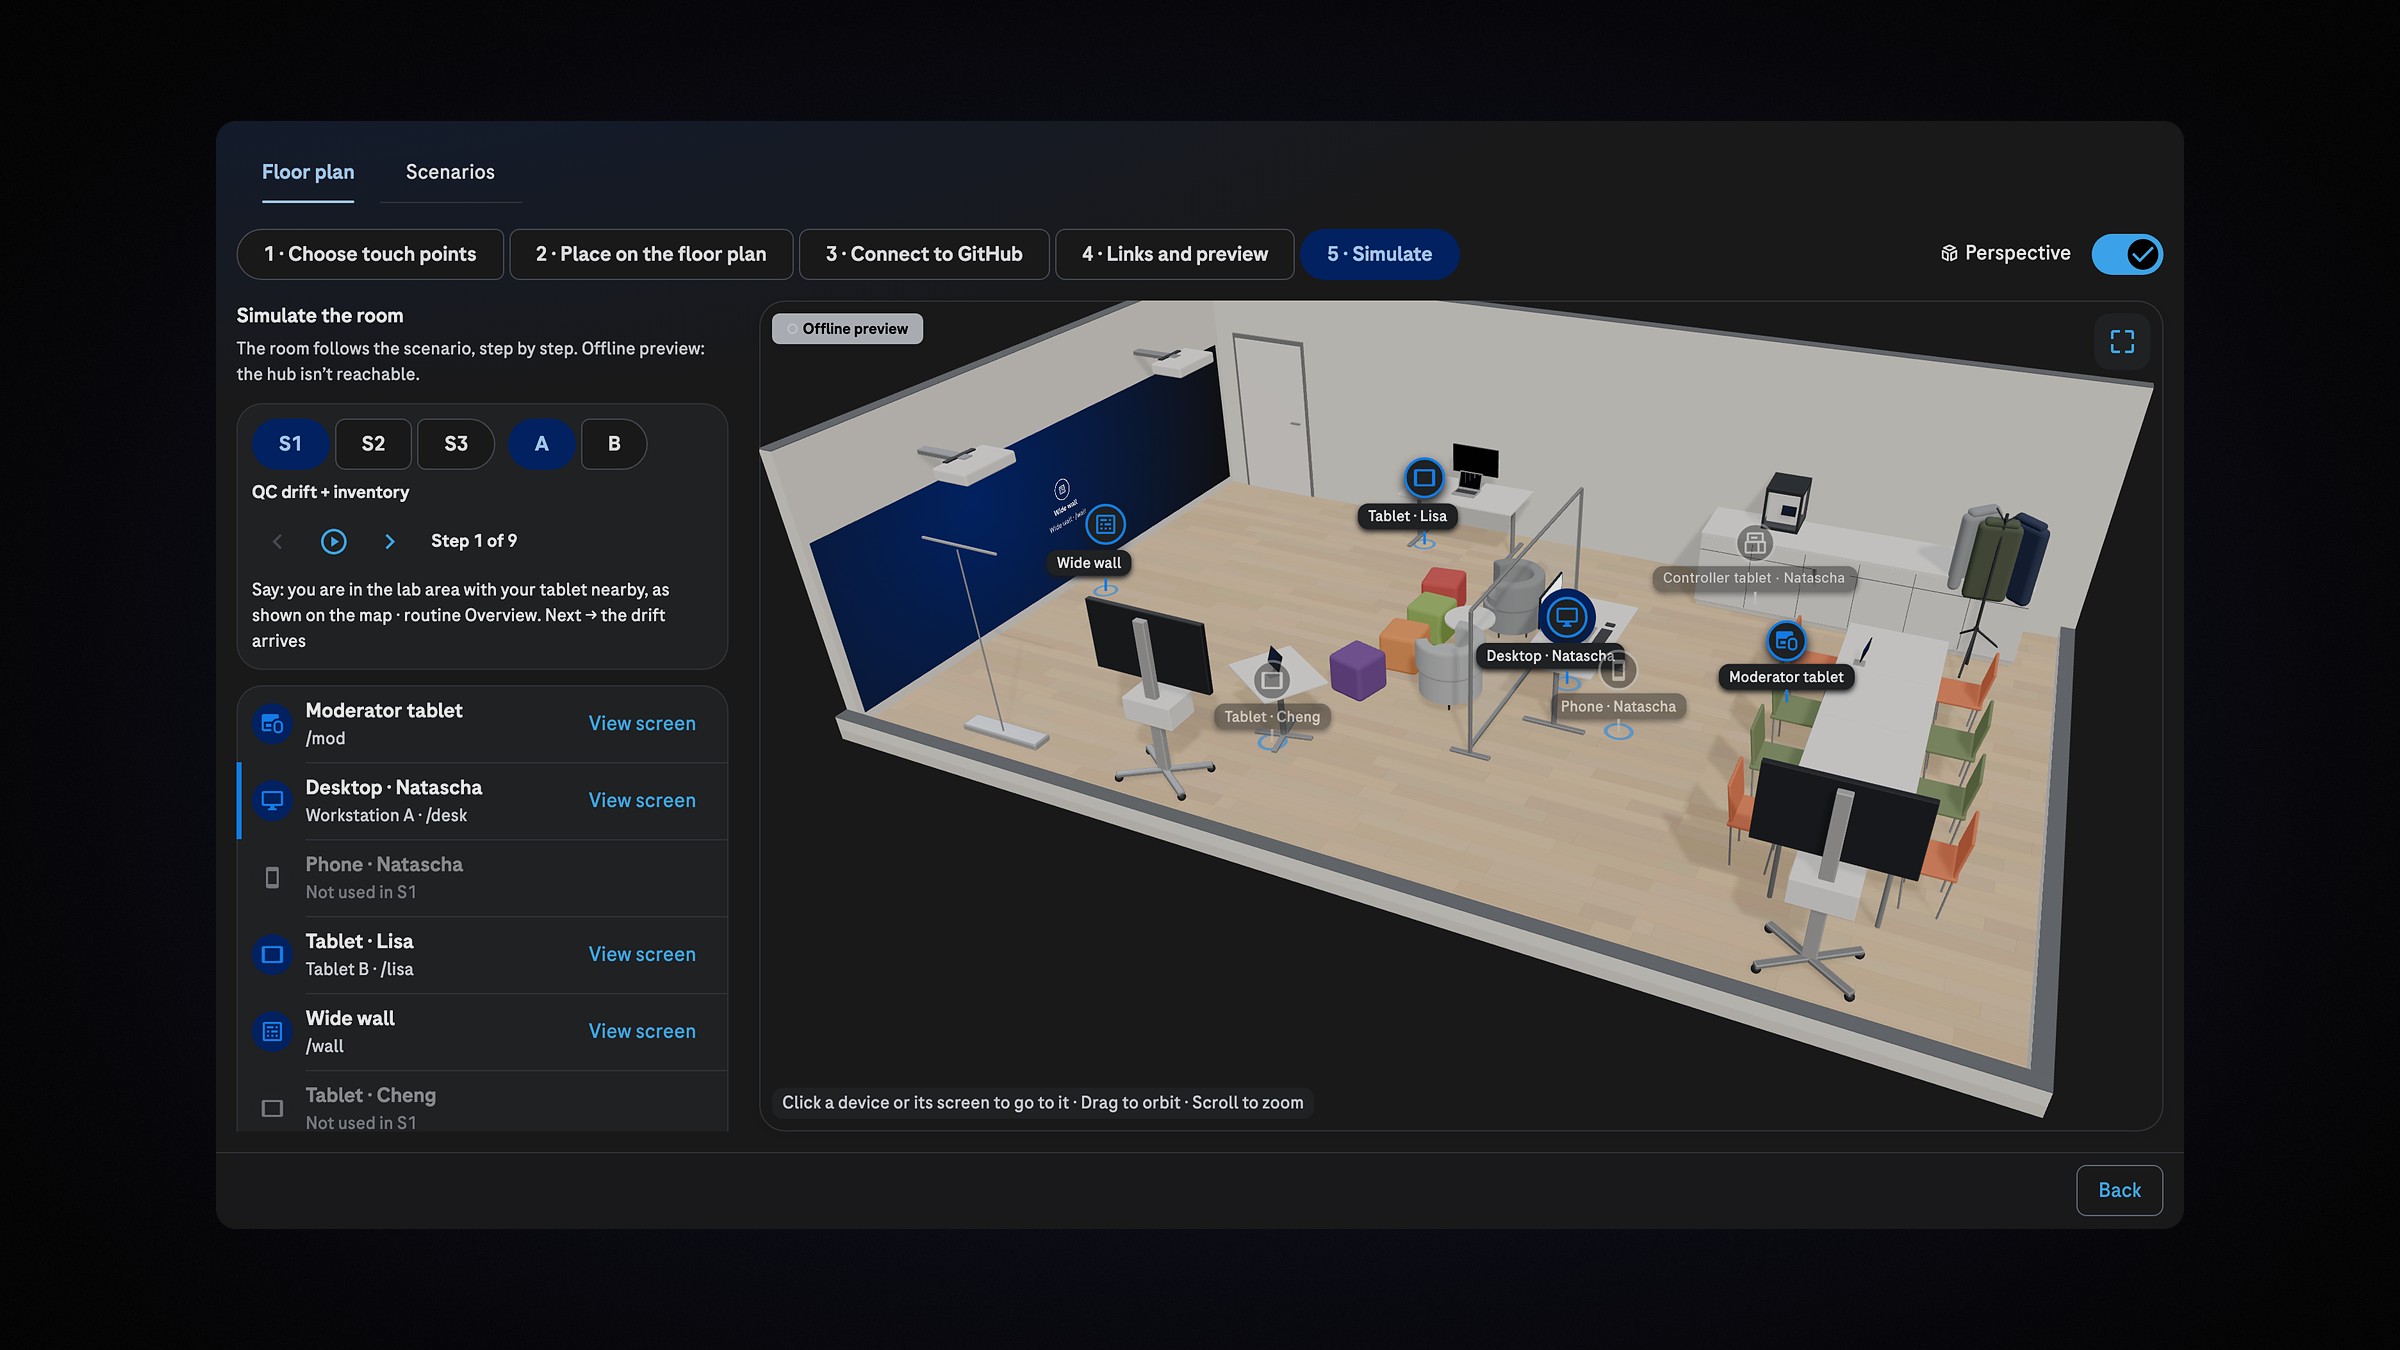
Step five plays a scenario through the room, and the camera moves to each touch point as its screen changes. The team checks the whole flow across every device before the session begins, without a full dry run in the room.

Rehearse on screen

Click any device to fly to it and see its screen at that step.

06

Guide in, one file out

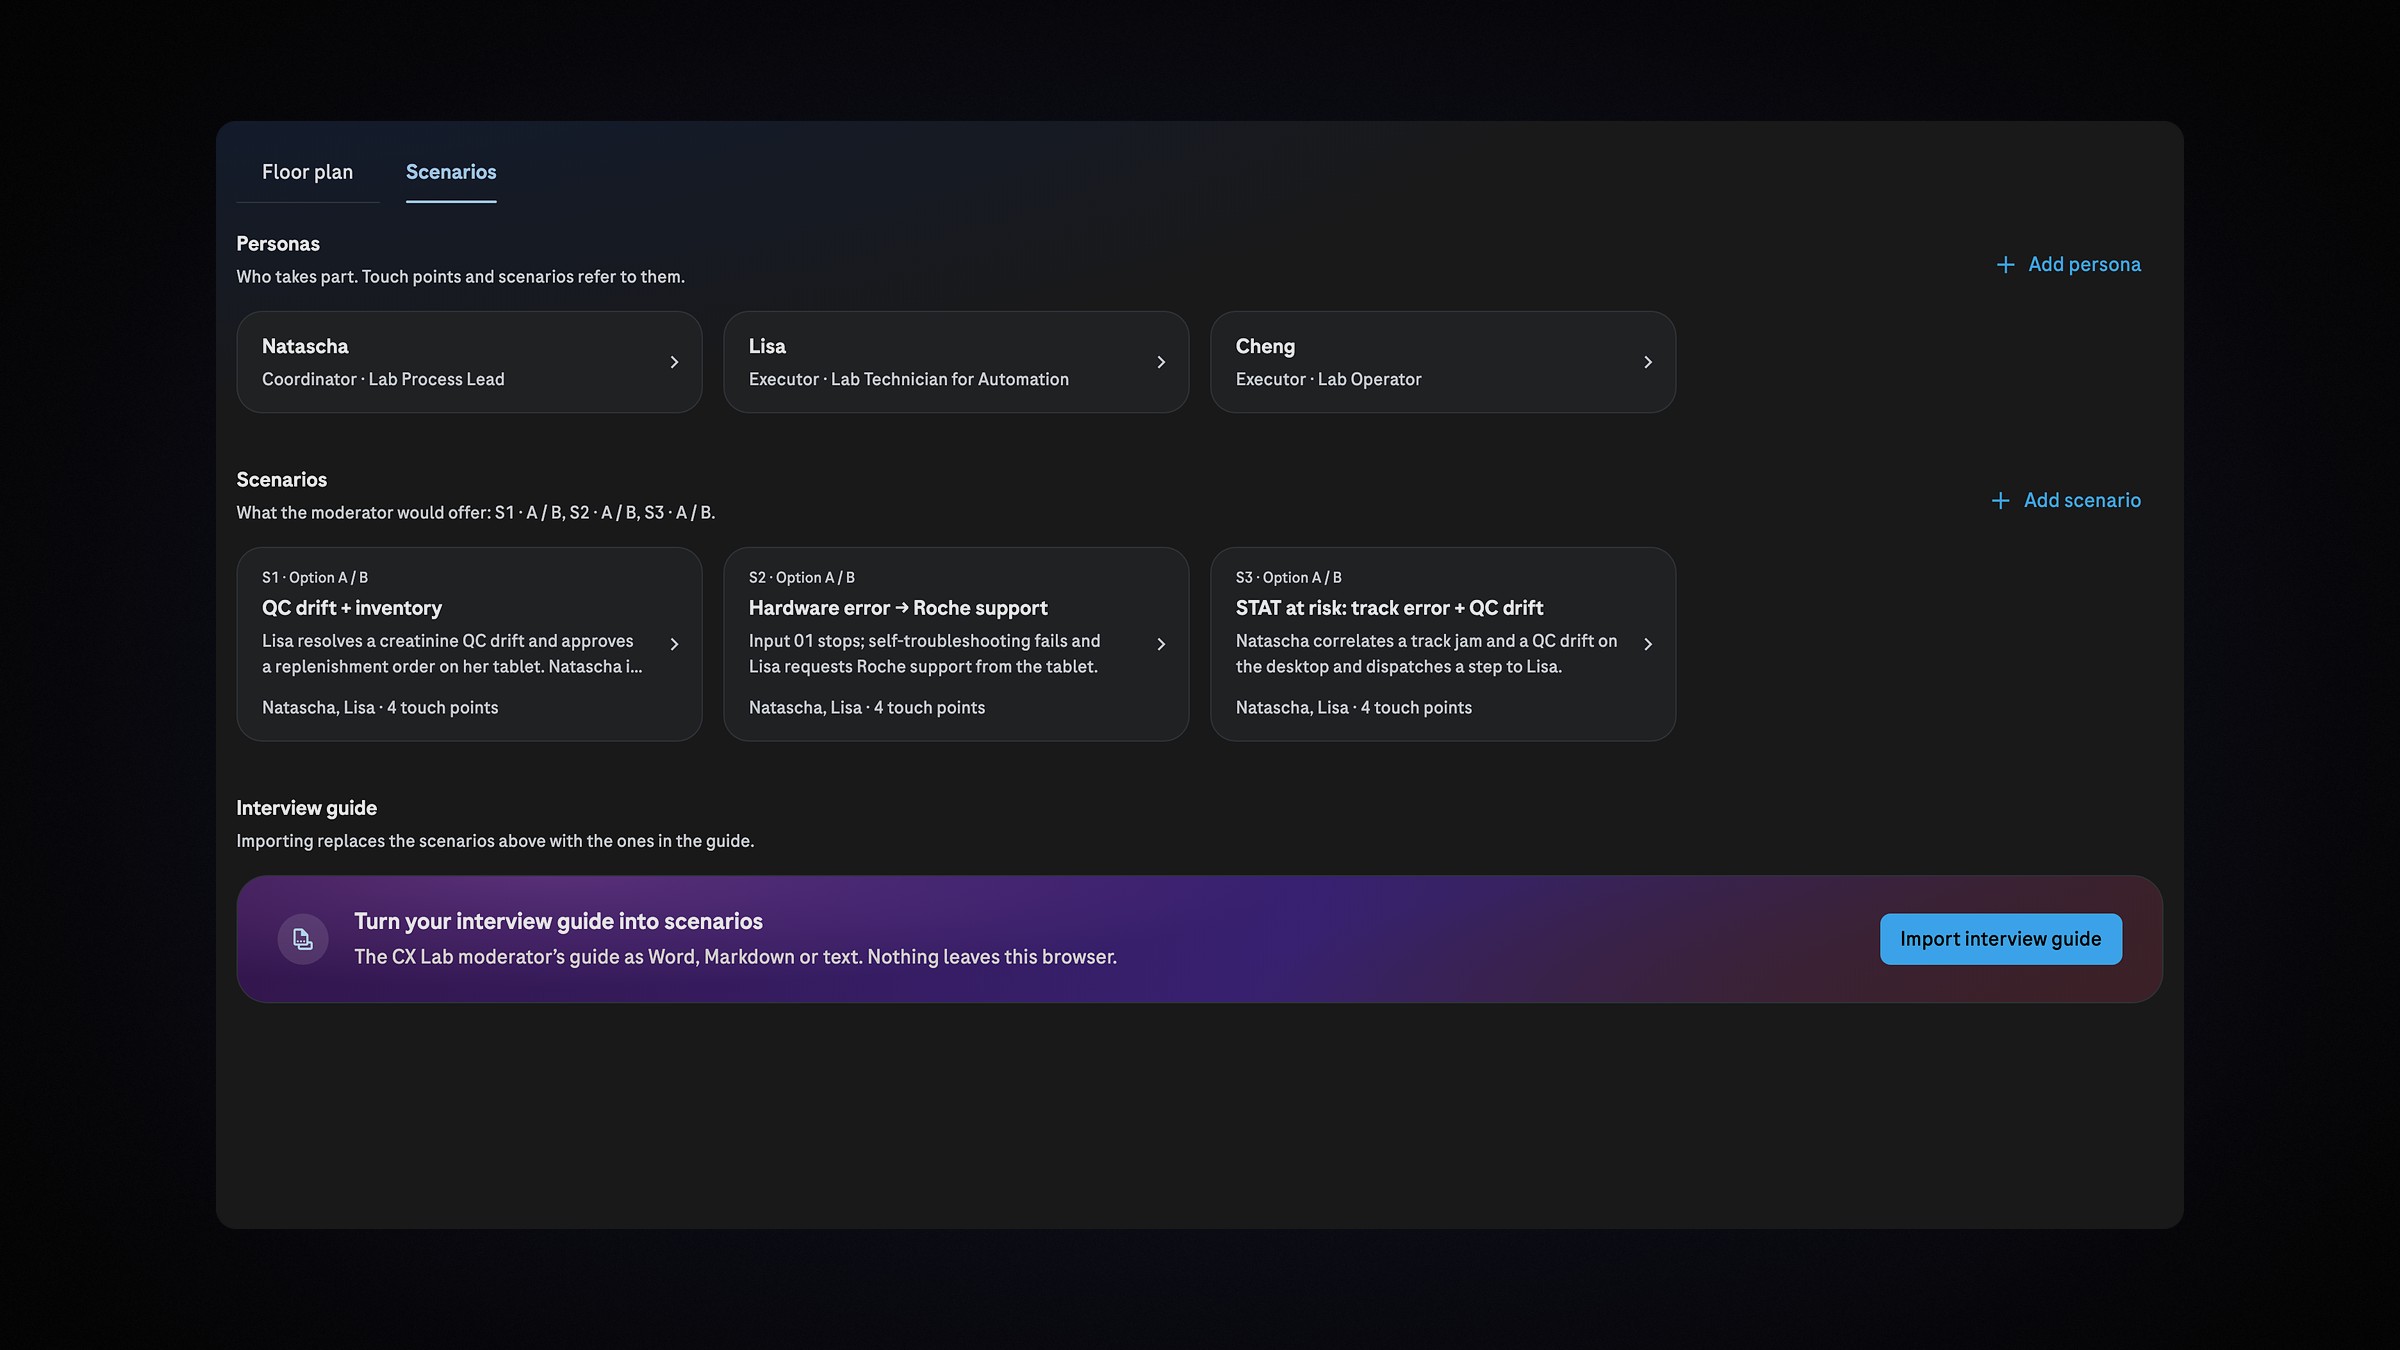
Personas and scenarios sit on the second tab as simple cards. Drop in the moderator's interview guide as Word, Markdown or text, and the configurator proposes scenarios mapped to the touch points for review. Then one Markdown file holds the whole lab: devices, placements, routes, personas and scenarios. Until someone downloads it, everything stays in the browser.

Guide in, one file out

The Scenarios tab: personas, scenarios with options A and B, and the guide import.

In motion

Outcomes

  • 6–8devices per session, once set up by hand
  • 5steps from an empty room to a rehearsal
  • 1 scanper device, instead of a typed link
  • 1 filein Markdown describes the whole lab
  • A working prototype went into use for customer experience lab sessions
  • A product-neutral template followed, reusable by other teams with one project file
  • A 95-second overview film, in dark and light versions, covered the whole flow
  • Next, toward a shared service: one-click deployment and live simulation

What I took away

  • Rehearse before the room. Playing a scenario on screen finds the problems that used to wait for a full dry run.
  • Make the set-up a file. One Markdown file holds the whole lab, so a session can be shared, reused and restored.
  • Keep sensitive guides local. The interview guide is read in the browser, and nothing leaves it unless someone downloads the configuration.
Design
Preetham Lawrence
Have a hard problem worth solving?

Let's solve it together.

preetham.lawrence@icloud.com
+41 76 740 46 30Phone
LinkedIn↗ Writing on Medium↗

Design leader based in Zürich, Switzerland. Open to leadership roles and selected collaborations.

© 2026 Preetham LawrenceIndex